| TigerJython4Kids | robotics |
| Deutsch English |
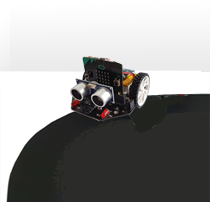
5. INFRARED SENSORS
![]()
YOU LEARN HERE...... |
how the robot can recognise the brightness of the surface with its infrared sensors. |
HOW AN INFRARED SENSOR WORKS? |
As the infrared light reflects differently on light and dark surfaces, the sensors can differentiate between a dark and light surface and return a digital value of 0 (dark) or 1 (light). The mbRobot has 2 infrared sensors (irLeft, irRight). They are located on the lower side of the board. The Maqueen Plus V2 has 5 infrared sensors (irL1, irL2, irL3, irR1, irR2, irM), the Maqueen Plus even has 6 infrared sensors (irL1, irL2, irL3, irR1, irR2, irL3, irR3), where irLeft = irL1 and irRight = irR1. This means that all subsequent programmes can be used for all models. |
EXAMPLES |
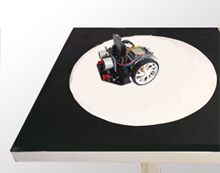
from mbrobot import * #from mbrobot_plusV2 import * repeat: v = irLeft.read_digital() if v == 0: rightArc(0.1) else: leftArc(0.1) delay(100) You can also run the programme in simulation mode. To do this, you must insert the following two lines after the line from mbrobot import *: RobotContext.useBackground("sprites/blackarea.gif")
RobotContext.setStartPosition(430, 350)
The first line adds the background image ‘blackarea.gif’, the second line determines the position at which the robot appears at the beginning. (The graphics window is 500 x 500 pixels, the coordinate (0,0) is top left). All images used in the examples and tasks are included in the TigerJython distribution (Image library). You can also use your own background images. If you then want to run the programme in real mode again, you must deactivate the lines with RobotContext (precede with #). You can already see in simulation mode that the robot control depends on the radius of the left or right arc. If it is too small (e.g. 0.05), the robot moves very slowly and unsteadily. If it is too large (e.g. 0.6), it often loses the track.
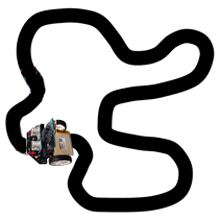
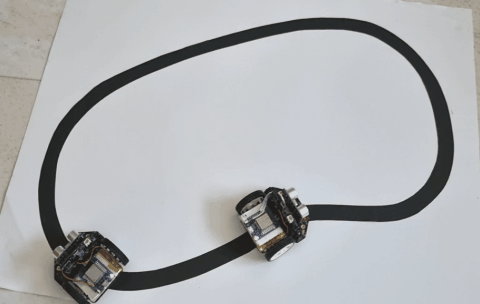
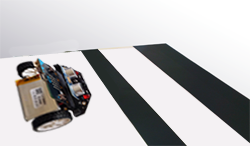
from mbrobot import * #from mbrobot_plusV2 import * #RobotContext.useBackground("sprites/trail.gif") setSpeed(30) repeat: vR = irRight.read_digital() vL = irLeft.read_digital() if vL == 0 and vR == 0: forward() elif vL == 1 and vR == 0: rightArc(0.1) elif vL == 0 and vR == 1: leftArc(0.1) delay(100) For the simulation, you must activate the line with RobotContest and use the background image trail.gif. In real mode, you must deactivate this line again. Depending on the size of the replicated template, you must adjust the speed and the radius of the arcs. Example 3: Driving a square
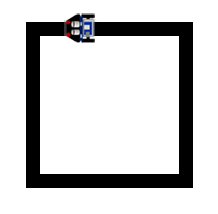
from mbrobot import * #from mbrobot_plusV2 import * RobotContext.useBackground("sprites/field1.gif") RobotContext.setStartPosition(380, 400) def keepOnTrack(): if vL == 0 and vR == 0: forward() elif vL == 0 and vR == 1: leftArc(0.1) elif vL == 1 and vR == 0: rightArc(0.1) repeat: vR = irRight.read_digital() vL = irLeft.read_digital() if vL == 1 and vR == 1: left() delay(500) else: keepOnTrack() delay(100) Use the background image field1.gif for the simulation. The Maquen Plus has six infrared sensors. You can see their designation at the bottom of the chassis. They return the values 0 (dark) or 1 (light) with the commands:
irLeft.read_digital() bzw. irL1.read_digital()
from mbrobot import * #from mbrobot_plusV2 import * setSpeed(30) repeat: vR = irRight.read_digital() vL = irLeft.read_digital() d = getDistance() if d < 20: stop() left() delay(1500) stop() else: if vL == 0 and vR == 0: forward() elif vL == 1 and vR == 0: rightArc(0.1) elif vL == 0 and vR == 1: leftArc(0.1) elif vL == 1 and vR == 1: backward() delay(100) The sensor values are queried every 100 milliseconds in the same repeat loop. The programme block after else corresponds to the programme code in example 2. |
REMEMBER... |
You can use the infrared sensors to measure the brightness of the base. The irLeft.read_digital() function returns the value of the left infrared sensor as 0 if the base is dark or 1 if it is bright. Several different sensors can be used at the same time. |
TO SOLVE YOURSELF |
|

![]()
Technical information::
At the beginning, the state variable s is set to zero. The state is switched in the while loop:
....

s = 0
forward()
repeat:
    v = irLeft.read_digital()
    if v == 0 and s == 0:
        # Bei Haltestelle
        s = 1
        ...
    if v == 1 and s == 1:
        # Auf weisser Zwischenfahrt
        s = 2
    if v == 0 and s == 2:
        # Am Endbahnhof
        ...